
Step 1 : Open the scanned photo of my sketch
Step 2 : Utilise the brush tool to create an outline and paint the insides of the shapes of my sketch

Step 3 : Utilise the eraser tool to touch up on the picture

Step 4 : Utilise the magic wand to select any irregularities of the photo and turn them white

Step 5 : Utilise the paint bucket tool to paint the background

Step 6 : Apply filters
This is the end-product of my first painting
No Phone Zone


Step 2 : Distort the shapes

Step 3 : Rasterize shapes which require a different color at the intersection point

Step 4 : Duplicate the dominant shape in which the intersection point is located at

Step 5 : Select inverse of the less dominant shape, copy it, and paste it


Step 7 : Select paint bucket to paint the background

Step 8 : Apply filters
This is the end-product of my second painting
No Phone Territories


Step 2 : Distort the shapes that require to be distorted

Step 3 : Apply the paint bucket to color the background

Step 4 : Apply filters
This is the end-product of my third painting
No Phone Zone Rooms

Filters That were Added to All Paintings
Step 0 : Save the Photoshop file as a Jpeg file
Step 1 : Increase the saturation to 60

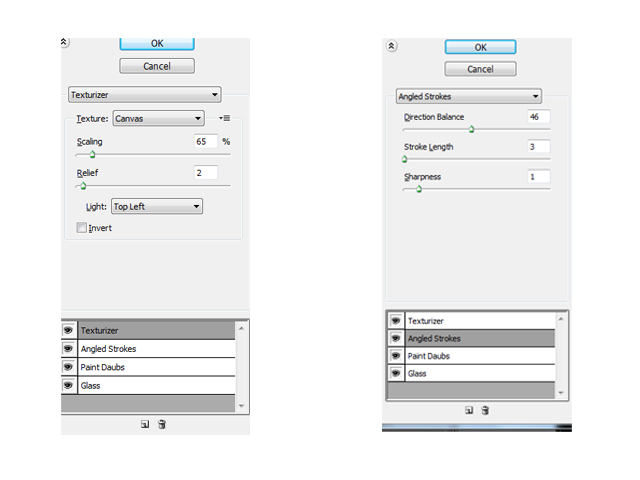
Step 2 : Apply these 4 filters:-
Texturizer
Angled Strokes
Paint Doubs
Glass


Step 4 : Select the Stylize filter option and choose emboss.

No comments:
Post a Comment